Multi-Factor Authentication (MFA) Guide
What is MFA?
MFA is a security system that uses more than one factor to confirm your identity when accessing ADELE. The first factor is your username and password. The second factor is either a time-based one-time code from an authenticator app on your phone or a registered security key that you tap or insert when prompted. Even if someone knows your password, they cannot access ADELE without your second factor.Why ADELE Requires MFA
MFA is expected as the standard, inline with the Information Security Manual (ISM) controls and Essential Eight; single-factor is no longer considered adequate for sensitive information and any deviation would need formal risk treatment and approval.Why should I use MFA
ADELE contains sensitive learning content and user data that, if compromised, could impact Defence functions or the safety and reputation of individuals. Users with access to online systems and data repositories – especially those with privileged roles – are more likely targeted by malicious actors. Using MFA is one of the simplest and most effective ways you can protect both your account and the ADELE environment.Whitelisting & Exemptions
All ADELE accounts must have MFA setup to protect against unauthorised access. Users on the Defence Protected Environment (DPE) may be whitelisted from entering a code every time they log in, because their physical and network access already provides an additional factor (e.g. DCAC card).In rare cases where a user genuinely cannot keep a personal device for an extended period (for example, specific deployment or posting conditions), an exemption from setting up MFA may be requested with supervisor approval and justification. Users with a role higher than a teacher are considered to have a privileged role and cannot be exempted from MFA requirements.
MFA Requirements for ADO
ADO users of ADELE do not need to setup MFA in ADELE, and can login immediately using the Login via VERA button. You may be required to enter your DPN email address and password, and to insert your DCAC during login or to choose a numbered code inside Microsoft Authenticator, if you have set this method up.Click here to learn how to add additional MFA methods to your Microsoft 365 VERA account.
MFA Requirements for Non-ADO
Non-ADO users must setup MFA inside ADELE since they cannot login using VERA. There are two methods that are supported; one-time codes from a mobile app, or you may choose to use a security key which is a hardware device such as a modern smartphone or a hardware device designed for this purpose. Your mobile phone can use its keyvault to store a token that lets you login by pointing your camera at the QR code during login.What you need ready
- A device you can keep with you (for example, your mobile phone).
- Either a TOTP authenticator app (such as Microsoft Authenticator, Google Authenticator, 1Password, Authy) or a compatible hardware security key.
- Your ADELE username and password (for non-ADO accounts) or your DPN credentials (for ADO personnel using VERA).
Setting up MFA takes just 2–3 minutes. Follow these steps:
🖼️ Tip: Click any step image to view a larger, high-quality version.
Access ADELE
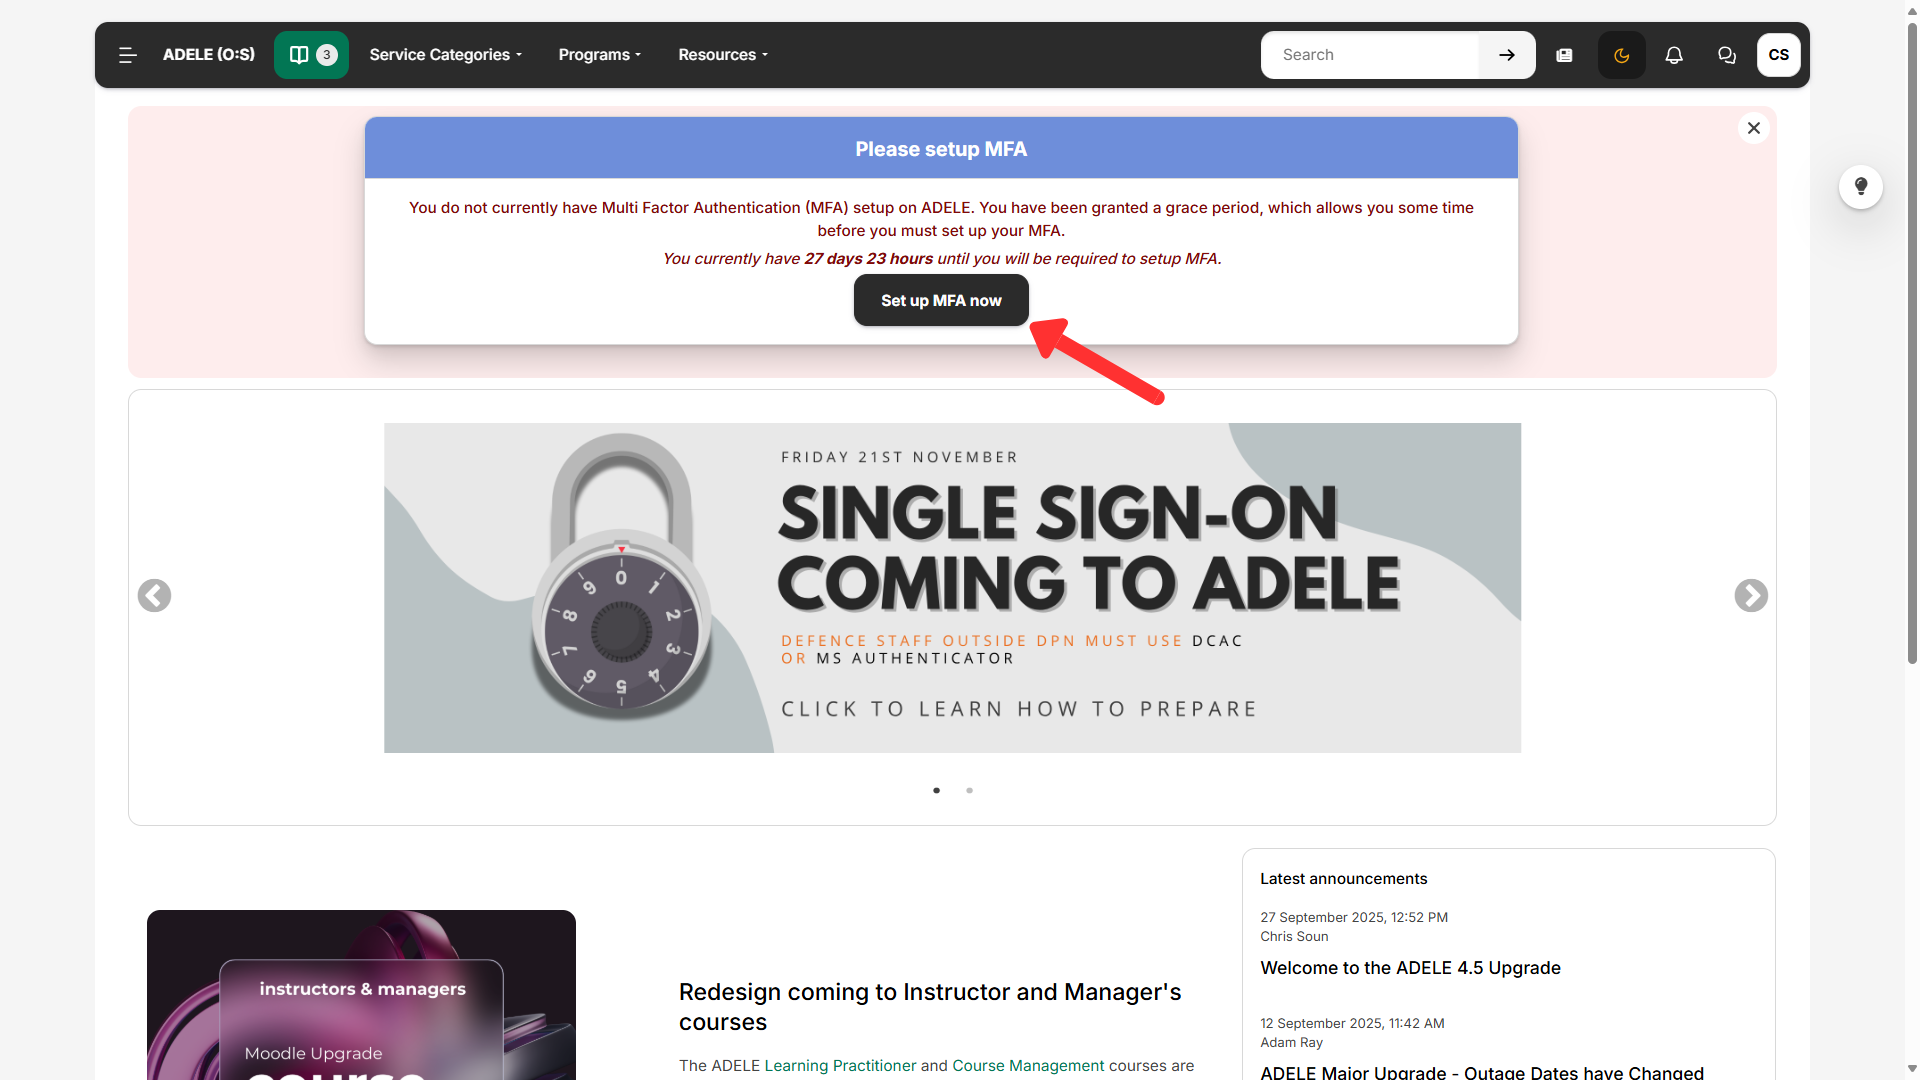
On your first sign-in, you can access ADELE with a 28-day grace period. On the home page, you will see a banner showing "Please set up MFA". Click on Setup MFA now.
If the above banner does not display
For ADELE (O:S): Click here
For ADELE Open: Click here
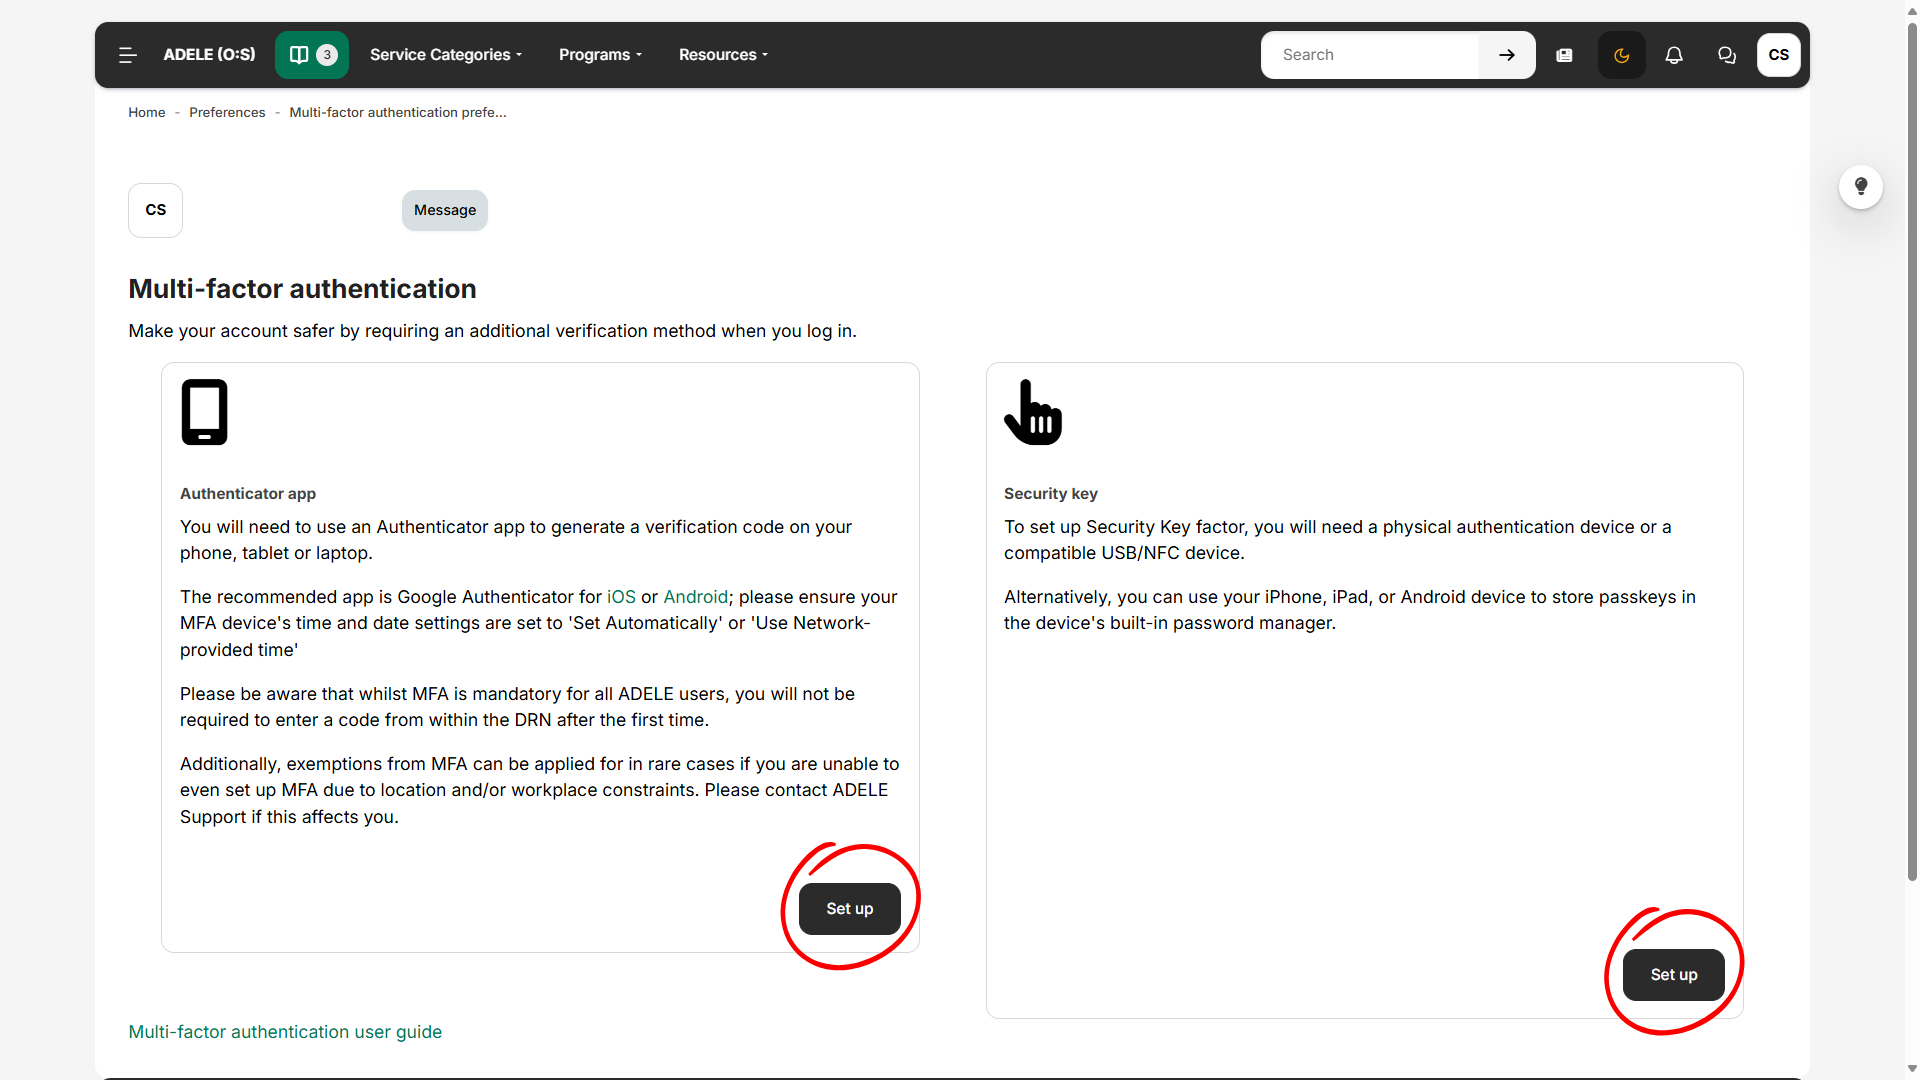
Set Up MFA
To set up your MFA, choose one of the two available options: Authenticator App or Security Key. Use your selected option as your verification method when signing in to ADELE.
If you are selecting Authenticator App, go to step 3a. If you are selecting Security Key, go to step 3b.
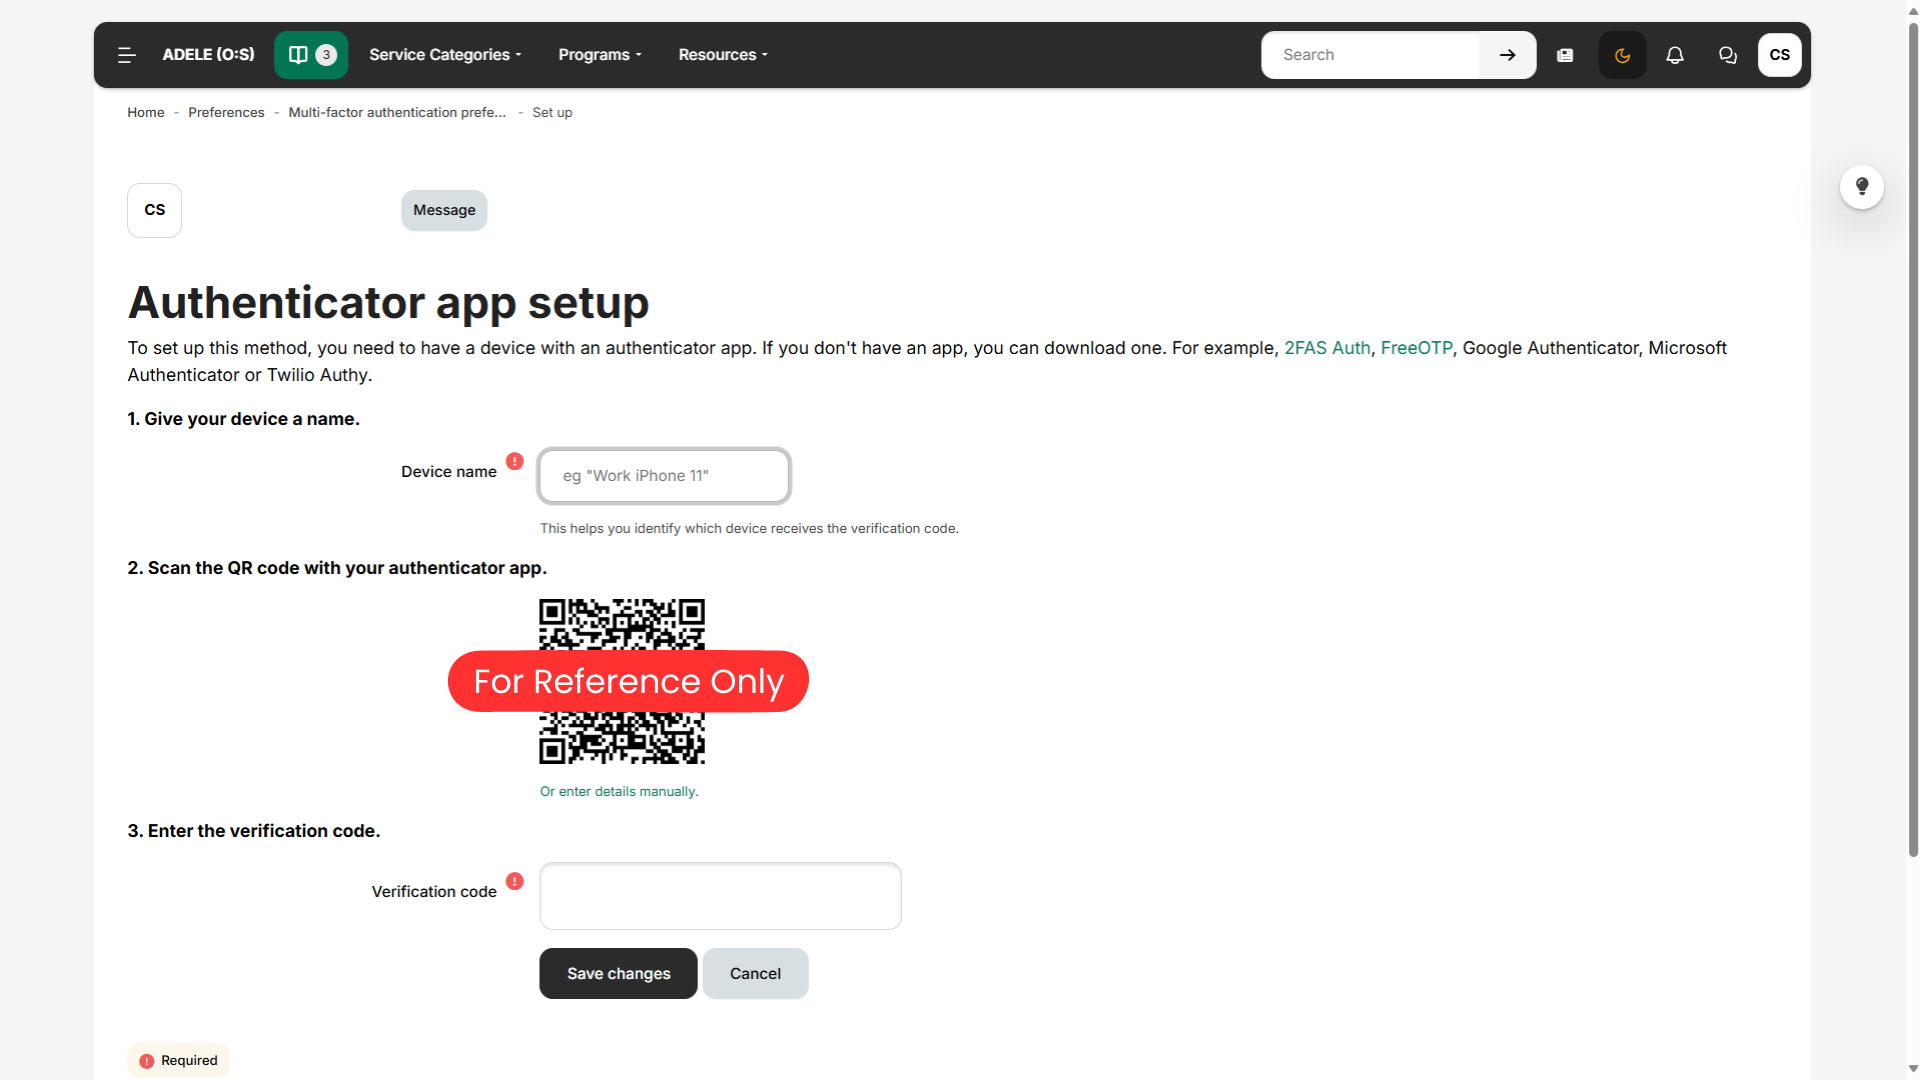
Set Authenticator App
Open your Authenticator App, tap the plus icon, and select Scan QR Code. Enter a device name, scan the QR code, and then enter the verification code to complete setup.
If you cannot scan the QR Code, select Enter Code Manually within your Authenticator App. Then under the QR Code on the ADELE Setup page, select Or enter details manually.
Already Set Up Authenticator App?
On your next sign-in, open your Authenticator App and enter the six-digit verification code when prompted.
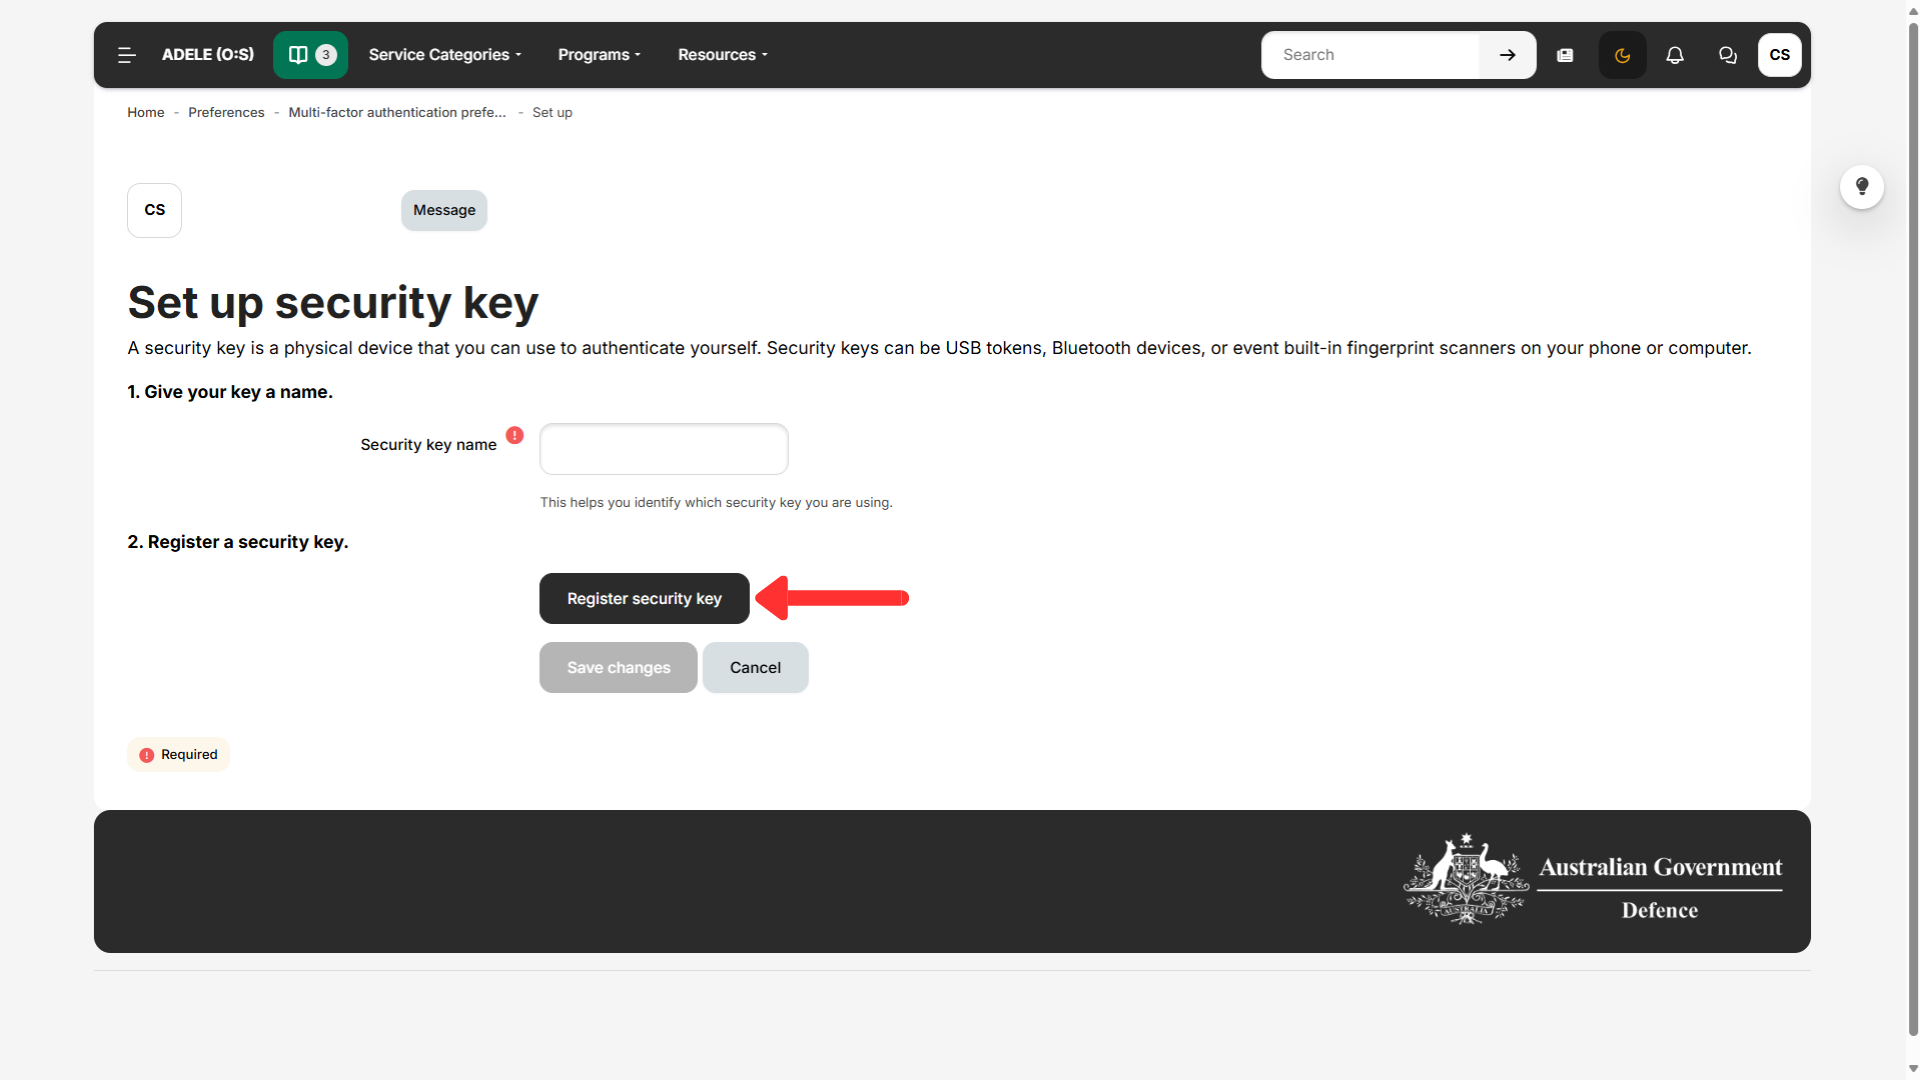
Set Security Key
Insert your Security Key into a USB port or connect it wirelessly if supported. Enter a name for your security key, proceed with the registration and tap your key when prompted to complete registration.
Already Set Up Security Key?
On your next sign-in, insert or tap your Security Key when prompted to verify your identity.
Complete Setup
Once your Authenticator App or Security Key is successfully added, click Finish to complete the setup. You’re now ready to sign in securely to ADELE using your chosen MFA method.
- Inside the ADELE authenticator app setup page, click Or enter details manually located below the QR Code.
- Open your authenticator app (for example, Google Authenticator) and select Enter a setup key.
- Copy the Account and Enter a setup key detail from ADELE, ensuring the key type is set to Time-Based.
- Click Add to save the account.
- Your authenticator app will then display a six-digit verification code.
Sign In Process
- Go to ADELE sign-in page.
- Enter username + password.
- Open authenticator app.
- Type the current 6-digit code.
Session Length
After a successful sign-in, ADELE may keep you signed in for up to 24 hours on that browser. You'll be asked for a new code next time you log in or if your session expires.
✅ Best Practice (with old phone access):
- Keep your old phone active and signed in.
- Install your authenticator app on the new phone.
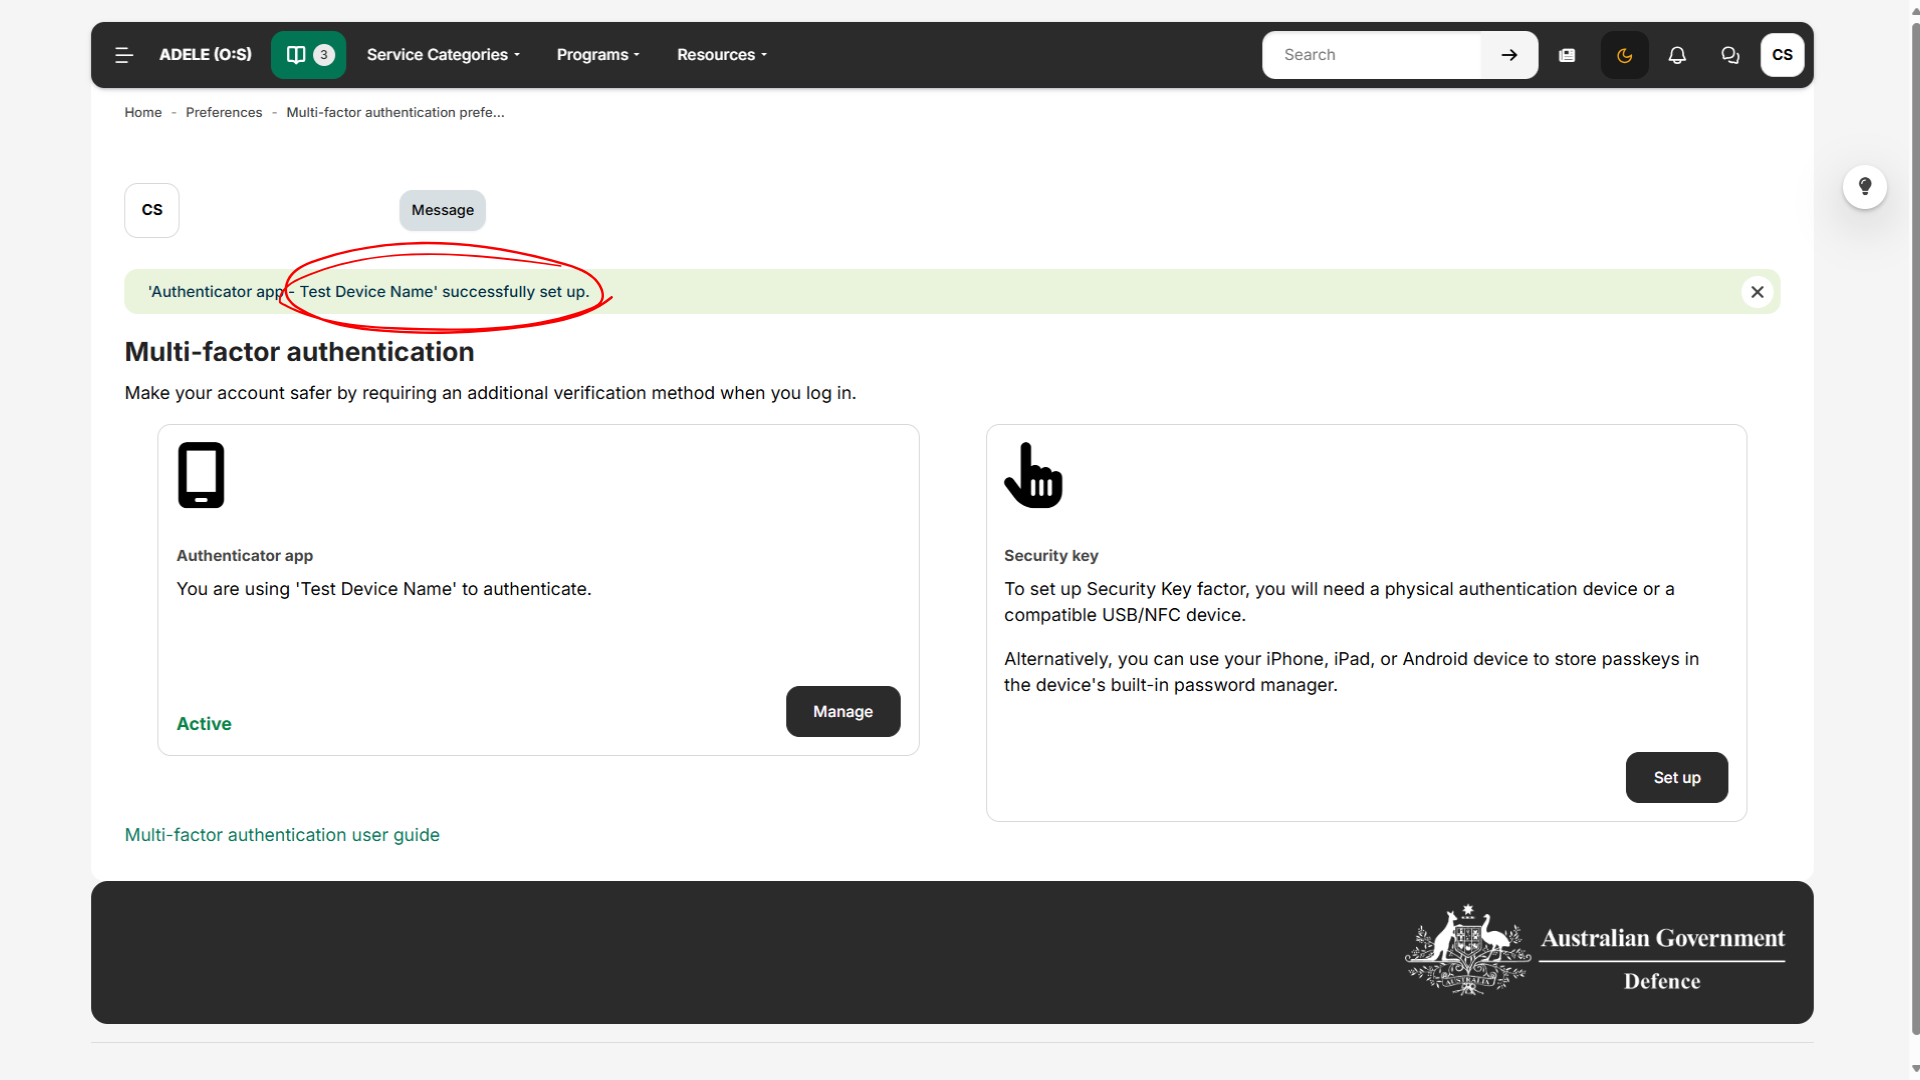
- In ADELE: Click on your initials → Preferences → Multi-factor authentication preferences → Manage → Replace.
- Scan the new QR code with the new phone.
- Confirm using a code from the new phone.
- Remove the ADELE entry from the old phone.
Contact Support (below) and ask for an MFA reset. We'll verify your identity before resetting the factor.
⚠️ Invalid Code
Issue: Code rejected during sign-in.
Solution: The code may have expired. Wait for the next code to generate, then try again.
⏰ Time Synchronisation
Issue: Codes consistently fail during sign-in.
Solution: In your phone’s Date and time settings, ensure date, time, and time zone are set to update automatically.
🔄 Duplicate MFA Entries
Issue: Multiple ADELE codes appear in your authenticator app.
Solution: Remove any old or duplicate ADELE entries before retrying.
📷 QR Code Not Scanning
Issue: Your camera cannot scan the QR code.
Solution: Select the manual setup key option in your authenticator app instead.
🚨 Lost or Stolen Device
Action Required: Contact Support immediately to reset your MFA and secure your account.
- Lock your phone and authenticator app.
- Update your OS and apps regularly.
- Prefer known Wi-Fi or use a VPN on untrusted networks.
- Avoid unknown charging cables/ports (or use a USB data blocker).
- Report your lost/stolen device to ADELE Support and to your supervisor immediately.